Raspberry Pi SSH Setup
I previously blogged about the Raspberry Pi Development Flow. A key component enabling that development flow is SSH, a tool that will enable you to copy files and run remote commands on the Raspberry Pi.
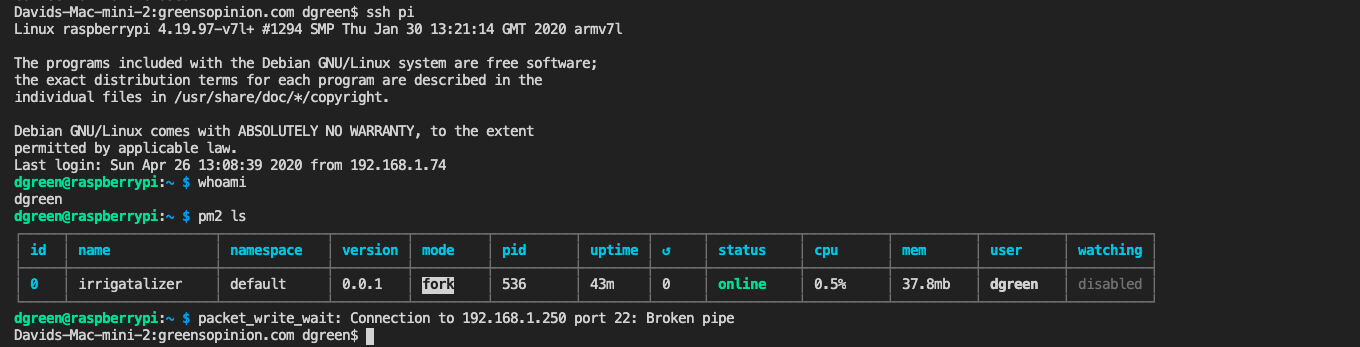 Remote login to a Raspberry Pi
Following are the steps that you can take to configure SSH on your new Raspberry Pi.
If you haven’t yet got a Raspberry Pi, you’ll need to get one. I purchased mine from CanaKit. I got the starter kit, which arrived about 3 days after I placed the order.
Once you’ve got it powered on with a keyboard, mouse and monitor attached, you can follow these steps to setup SSH in a way that supports minimal fuss:
- Before You Get Started
- Enable SSH on the Pi
- Create a New User on the Pi
- Setup for Login Without a Password
- Give Your Pi a Name
Background
SSH (Secure Shell) is a tool that enables you to copy files and run remote commands on your Raspberry Pi. SSH uses cryptography to ensure that your remote sessions are secure. SSH has a server portion (a daemon process) that runs on the Raspberry Pi waiting for commands, and a client portion (a command-line tool) that you can run from your development machine. With SSH you’ll be able to remotely control your Raspberry Pi, and even work on the Raspberry Pi as if you were right there in a terminal.
Before You Get Started
Note the IP address of your Raspberry Pi. To do that, follow these steps on the Raspberry Pi:
- Open a terminal
- Run
ifconfig - Look for the section named
wlan0(if on Wi-Fi) oreth0(if on a wired network) - Locate the line that says
inetin that section, e.g.inet 192.168.1.250 - Write down the 4-part IP address
For example:
$ ifconfig
eth0: flags=4099<UP,BROADCAST,MULTICAST>  mtu 1500
        ether dc:a6:32:62:6a:63  txqueuelen 1000  (Ethernet)
        RX packets 0  bytes 0 (0.0 B)
        RX errors 0  dropped 0  overruns 0  frame 0
        TX packets 0  bytes 0 (0.0 B)
        TX errors 0  dropped 0 overruns 0  carrier 0  collisions 0

lo: flags=73<UP,LOOPBACK,RUNNING>  mtu 65536
        inet 127.0.0.1  netmask 255.0.0.0
        inet6 ::1  prefixlen 128  scopeid 0x10<host>
        loop  txqueuelen 1000  (Local Loopback)
        RX packets 0  bytes 0 (0.0 B)
        RX errors 0  dropped 0  overruns 0  frame 0
        TX packets 0  bytes 0 (0.0 B)
        TX errors 0  dropped 0 overruns 0  carrier 0  collisions 0

wlan0: flags=4163<UP,BROADCAST,RUNNING,MULTICAST>  mtu 1500
        inet 192.168.1.250  netmask 255.255.255.0  broadcast 192.168.1.255
        inet6 2001:569:7eb7:9400:3037:daab:bcf3:2fdc  prefixlen 64  scopeid 0x0<global>
        inet6 fe80::bec9:e792:710f:84f0  prefixlen 64  scopeid 0x20<link>
        ether dc:a6:32:62:6a:64  txqueuelen 1000  (Ethernet)
        RX packets 150  bytes 27774 (27.1 KiB)
        RX errors 0  dropped 0  overruns 0  frame 0
        TX packets 86  bytes 14509 (14.1 KiB)
        TX errors 0  dropped 0 overruns 0  carrier 0  collisions 0
In the above example, the IP address from wlan0 is 192.168.1.250
Enable SSH on the Pi
To start with, you’ll need to enable the SSH daemon process on the Raspberry Pi. To do that, from the keyboard plugged into the Raspberry Pi follow these steps:
- Open a terminal
- Run
sudo raspi-config. More details onraspi-configcan be found here: raspberrypi.org raspi-config - Using the arrow keys (up/down/left/right) navigate to Interface Options -> SSH and select Yes
- (optional) If you don’t want the Raspberry Pi to be running a graphical interface, it can be set to boot to a terminal instead. To do that, select Boot Options -> Desktop/CLI -> Console
- Select Finish to exit the
raspi-configtool - If prompted, select Yes to reboot the Raspberry Pi
Log In to the Pi
From now on, we’ll be running commands from your development machine (i.e. not the Raspberry Pi)
- Login to your Raspberry Pi from your development machine using the following command:
ssh pi@192.168.1.250(where the IP address that you noted earlier is substituted) - You may be prompted as follows:
The authenticity of host 'i (192.168.1.250)' can't be established.
ECDSA key fingerprint is SHA256:22yuFgmgNxTvEnpnEogya+hpNGECgyExp3hsx5vgAi8.
Are you sure you want to continue connecting (yes/no)?
Type
yesthen press enter - When prompted, enter your password for the
piuser on the Raspberry Pi - If successful, you should see a command prompt that looks something like:
pi@raspberrypi:~ $
Create a New User on the Pi
This step is optional. To avoid having to specify a username every time we login to the Raspberry Pi, we’ll create a new user on the Raspberry Pi with the same username that we have on our development machine as follows:
- Identify your username on your development machine by running
whoamifrom a terminal. My usernamedgreen, which I’ll use in examples from here forward. Substitute your own in the following steps. - ssh into the Raspberry Pi (per the previous step)
- Run
sudo useradd -m dgreento create the new user - Run
sudo passwd dgreento give the new user account a password - Run
groupsto find out which groups you should add to the new user accountpi@raspberrypi:~ $ groups pi adm dialout cdrom sudo audio video plugdev games users input netdev gpio i2c spi - Run
sudo usermod -a -G pi,adm,dialout,cdrom,sudo,audio,video,plugdev,games,users,input,netdev,gpio,i2c,spi dgreento add the new user to the relevant groups - Run
exit
To test out the new user, ssh back into the pi as follows from your development machine:
- Run
ssh 192.168.1.250to ssh into the Raspberry Pi. Notice that we’re not specifying a username. - Enter a password when prompted
- Do your happy dance, then run
exit
Setup for Login Without a Password
To setup login without a password, we’re going to generate a public/private key pair on the development machine. If you’ve done this before, you can skip this step.
- Run
ssh-keygen -t rsa - Accept the default path for the file
- When prompted, provide a password that will be used to encrypt the private key
It should look something like this:
$ ssh-keygen -t rsa Generating public/private rsa key pair. Enter file in which to save the key (/home/dgreen/.ssh/id_rsa): Created directory '/home/dgreen/.ssh'. Enter passphrase (empty for no passphrase): Enter same passphrase again: Your identification has been saved in /home/dgreen/.ssh/id_rsa. Your public key has been saved in /home/dgreen/.ssh/id_rsa.pub. The key fingerprint is: SHA256:R8BPBghF7BT6NwTLMDV6arrPw0RhPXYfeXl4usJS7QY dgreen@ahost The key's randomart image is: +---[RSA 2048]----+ | +BB+o. . o | | o*B+o.= + o | | .o=+o.=.+ + | | .+.. .E o | | .o . So.o . | | o. ..oo + | | .o . o | | oo | | ..o. | +----[SHA256]-----+ - Copy your public key to the Raspberry Pi as follows:
ssh-copy-id 192.168.1.250 - Run
ssh-addto add your private key to the SSH agent running on your development machine. You’ll need to do this once before using SSH to log in to your Raspberry Pi every time you restart your development machine.
Give Your Pi a Name
Finally, give your Raspberry Pi a name so that you don’t have to memorize it’s IP address. To do that:
- On your development machine, edit your
/etc/hostsfile and add a line that looks like this:192.168.1.250 pi - Try it out, e.g.
ssh pi
If you’re feeling really adventurous, you can configure your router with an IP reservation for the mac address on your Raspberry Pi. I’ll leave this one up to you to figure out.
Tips and Wrap Up
That’s it! From now on, your development flow can occur over SSH. You can run remote commands, copy files, restart processes, and control your Raspberry Pi in other ways from any computer on the same network as the Raspberry Pi.
- Copy files using SCP, e.g.
scp myproject.tgz pi:/home/dgreen - Run remote commands using SSH, e.g.
ssh pi "pm2 stop myproject && rm -rf myproject && tar -xzf myproject.tgz && pm2 start myproject" - Login using
ssh pi
For the optimal development flow, the next step is to automate the deployment of code and configuration to your Raspberry Pi.
Recent Posts
- Flutter Maps With Vector Tiles
- Raspberry Pi SSH Setup
- Raspberry Pi Development Flow
- Troubleshooting Android App Crash on Chromebook
- Article Index
subscribe via RSS